Database
Configure SQLite or PostgreSQL, run Drizzle commands, and switch database schemas.
ShipNext supports SQLite and PostgreSQL. SQLite is the default local setup; PostgreSQL is recommended for many production deployments.
PostgreSQL
PostgreSQL only requires a DATABASE_URL:
DATABASE_URL=postgresql://user:password@host:port/databaseMany hosted providers include a free tier that is enough for small personal products.
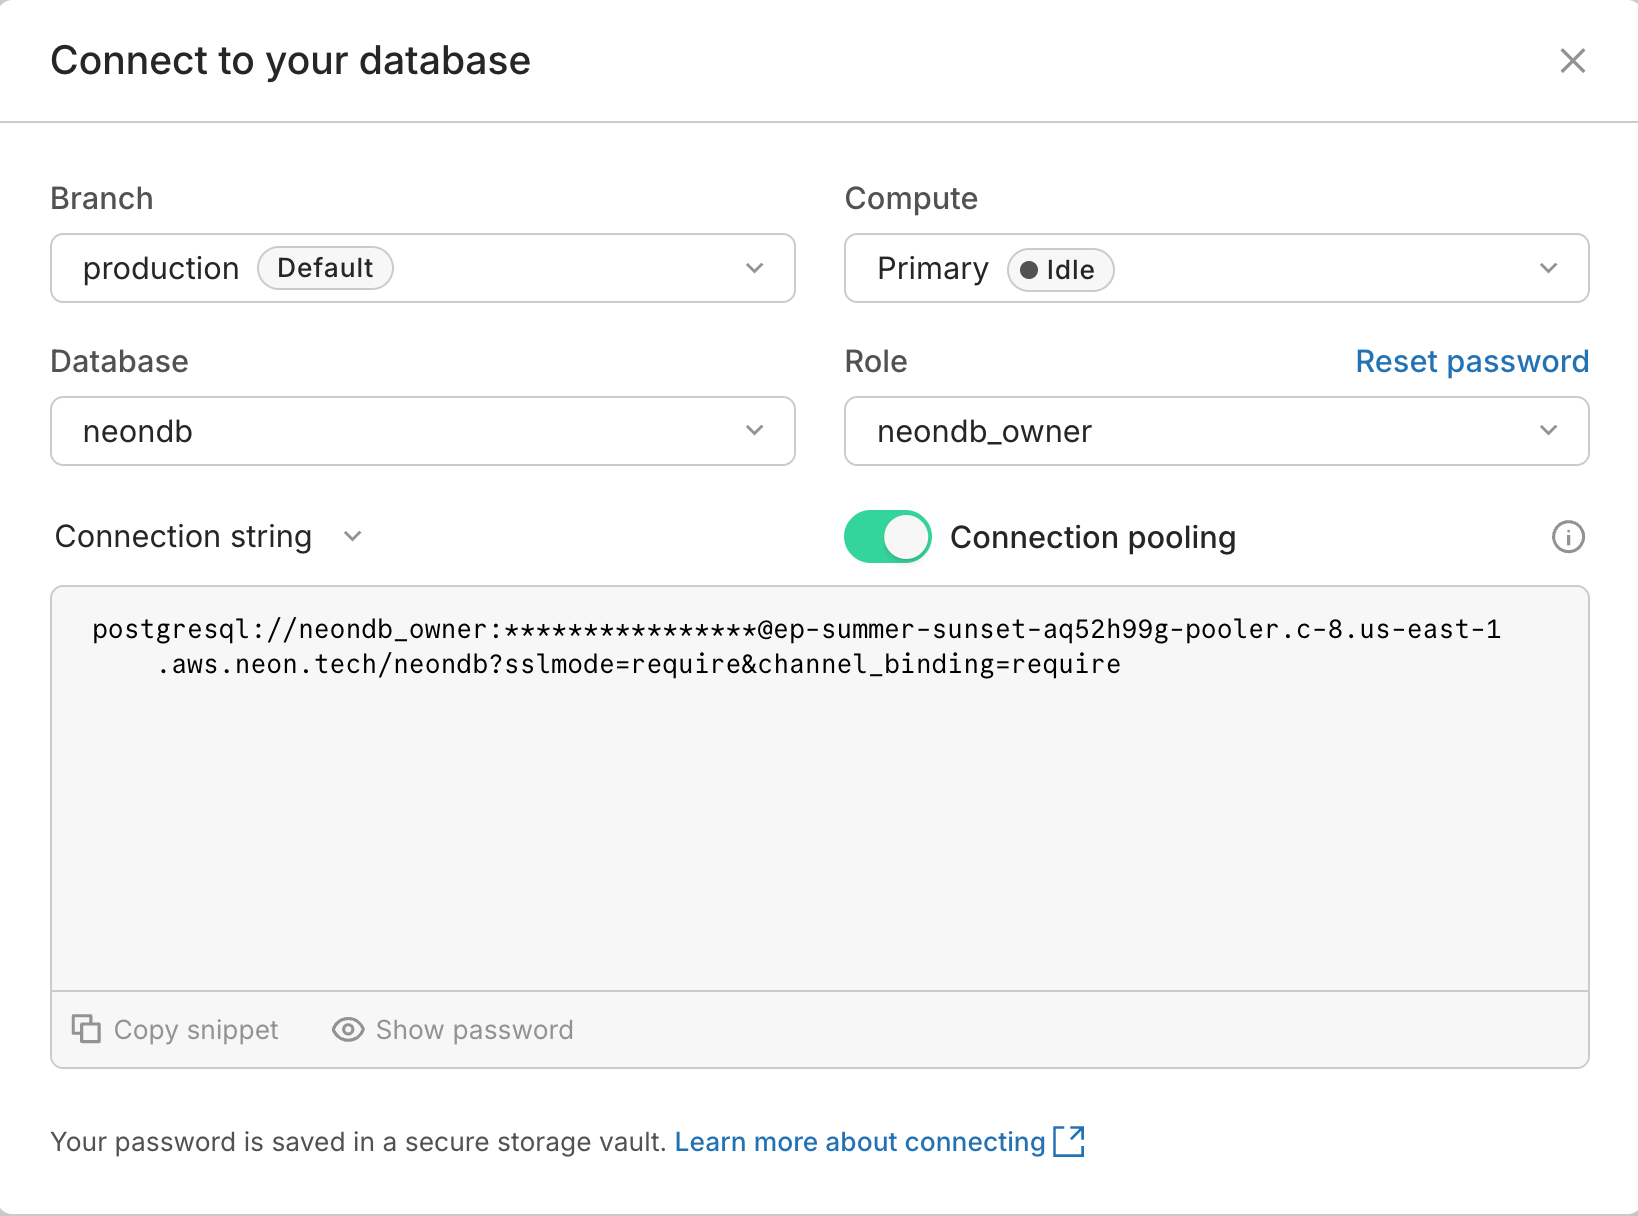
Neon has a strong developer experience and works well for small projects.
- Open Neon and create an account.
- Create a project, choose the PostgreSQL version and region.
- Click
Connection string. - Copy the connection string into
DATABASE_URL.
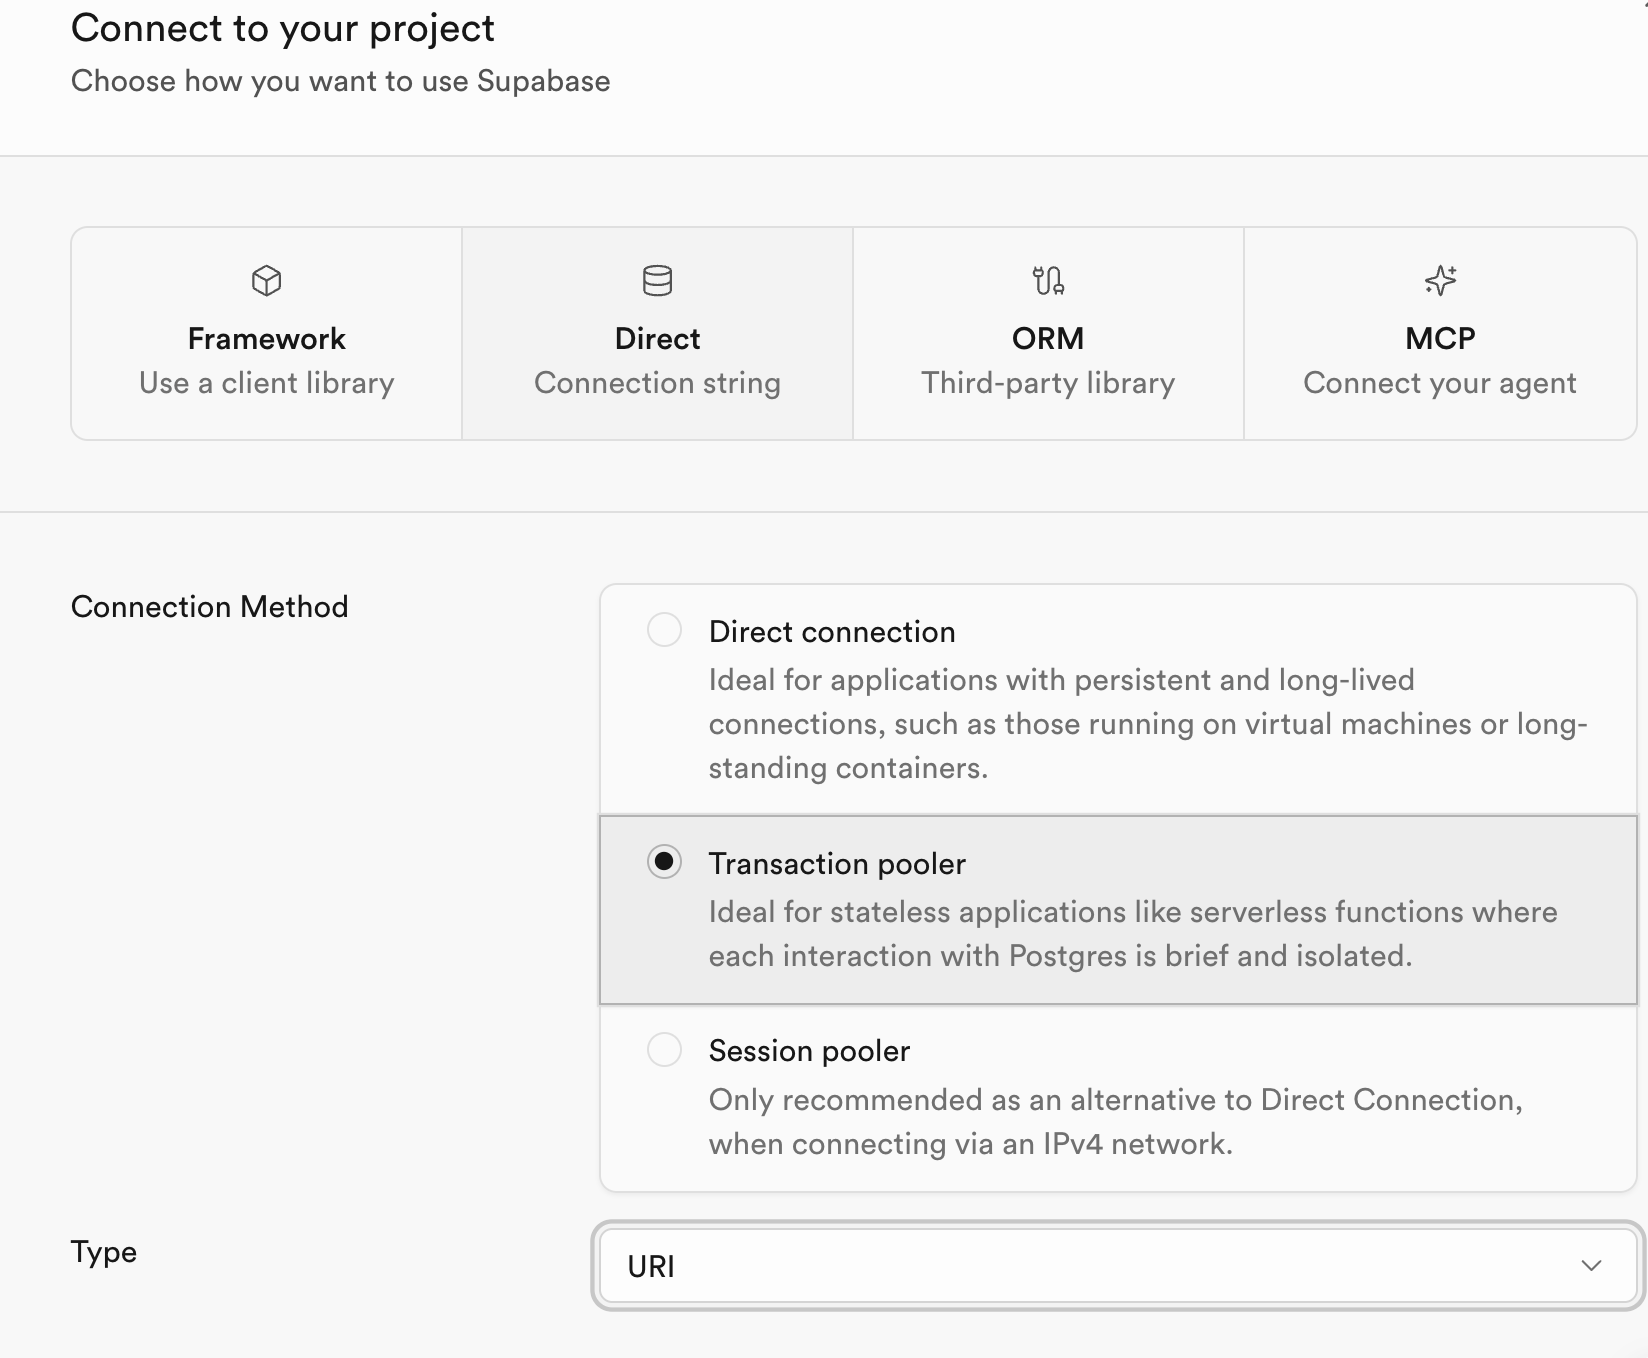
Supabase provides PostgreSQL plus auth and storage features.
- Open Supabase and create an account.
- Create a project, choose a password and region.
- Click
Connect. - Choose
DirectorTransaction pooler. - Copy the connection string into
DATABASE_URL.
postgresql://postgres.yprscmdqlicgpgcbcizu:[YOUR-PASSWORD]@aws-1-ap-northeast-1.pooler.supabase.com:6543/postgresReplace [YOUR-PASSWORD] with the database password.
Docker is useful for local PostgreSQL validation.
docker run --name shipnext-pg -e POSTGRES_PASSWORD=yourpassword -d -p 5432:5432 postgresThen set:
DATABASE_URL="postgres://postgres:yourpassword@localhost:5432/postgres"You can also install PostgreSQL locally. Follow the official installation guide, create a user/password, then set:
DATABASE_URL="postgres://postgres:yourpassword@localhost:5432/postgres"SQLite
SQLite is the default local setup.
Initialize the local database:
pnpm db:pushThis creates app.db in the project root.
Cloudflare D1 is a managed SQLite database. Create a D1 database in the Cloudflare dashboard, create an API token with D1 edit permissions, then connect it according to your deployment needs. The original template keeps this as a follow-up integration path.
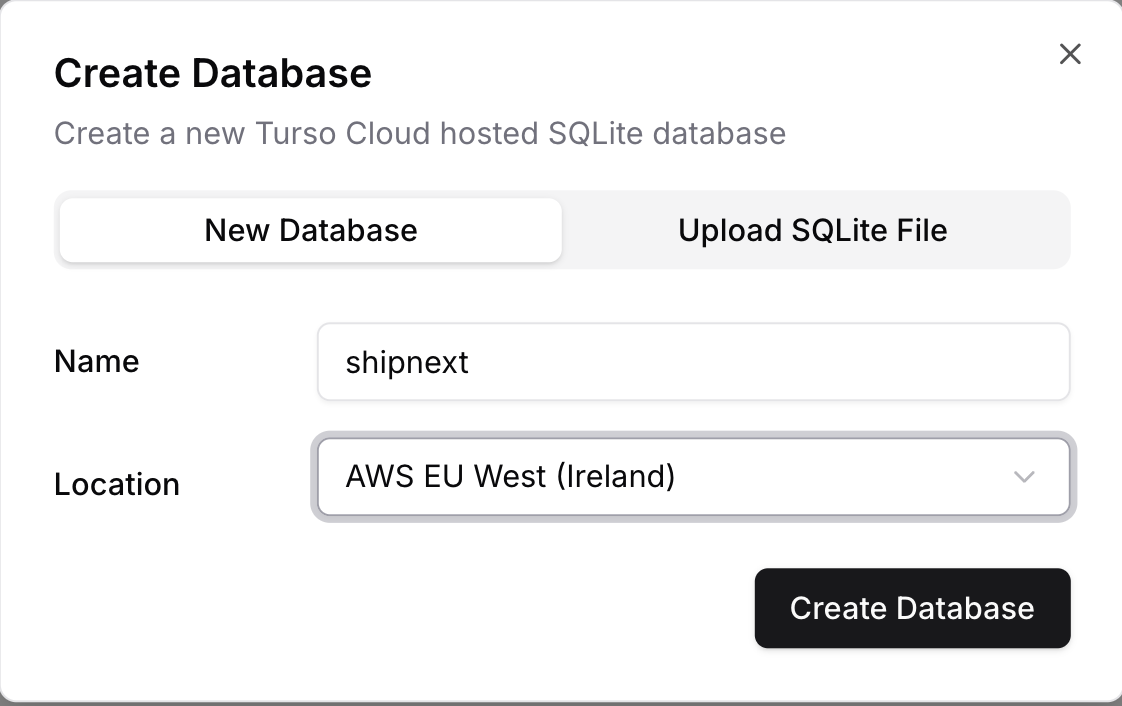
Turso is a managed SQLite-compatible database.
- Open Turso and create an account.
- Create a database and choose a location.
- Add the connection values required by your Turso setup.
Database commands
Push the current schema:
pnpm db:pushGenerate migrations:
pnpm db:generateRun migrations:
pnpm db:migrateOpen Drizzle Studio:
pnpm db:studioIt opens at https://local.drizzle.studio.
Switch database type
ShipNext includes schema files for both PostgreSQL and SQLite. Adjust the exports and client used by your app.
Schema export
export * from "./schema/pg/auth.schema";
export * from "./schema/pg/payment.schema";
export * from "./schema/pg/storage.schema";
Database client
export { db } from "./client/pg";Drizzle config
import config from "./drizzle.pg.config";Better Auth adapter
export const auth = betterAuth({
  appName: "ShipNext",
  database: drizzleAdapter(db, {
    provider: "pg",
    schema: {
      user: schema.user,
      session: schema.session,
      account: schema.account,
      verification: schema.verification,
    },
  }),
});
Schema export
export * from "./schema/sqlite/auth.schema";
export * from "./schema/sqlite/payment.schema";
export * from "./schema/sqlite/storage.schema";
Database client
export { db } from "./client/sqlite";Drizzle config
import config from "./drizzle.sqlite.config";Better Auth adapter
export const auth = betterAuth({
  appName: "ShipNext",
  database: drizzleAdapter(db, {
    provider: "sqlite",
    schema: {
      user: schema.user,
      session: schema.session,
      account: schema.account,
      verification: schema.verification,
    },
  }),
});
Add a schema
For a new business table, create a schema file such as business.schema.ts and export it from the central schema entry:
export * from "./schema/pg/business.schema";Use the existing auth, payment, and storage schemas as references.